Ticket Tutorial
1. How to Buy Online
2. Creating an Online Account
3. How to Become an Insider with Select Your Tickets
4. How to Renew Your Season Tickets/Select a Payment Schedule for your Ticket Package Online
5. Print-at-Home Ticket Download Tutorial
6. Ticket Exchange Tutorial
6. ALL-IN-1 Pass
How to Buy Online
STEP 1: SELECT VENUE AND EVENT
Select the venue where your desired event is taking place. Under the correct venue, the events taking place are listed. Click “Buy Tickets” on the desired event. If this brings you to another events listing, again choose the desired event and you will be brought to the purchase page. If the event is not yet on sale, it will have a time-stamp, which indicates the on-sale date and time.
STEP 2: SELECT QUANTITY
Type in the quantity of tickets desired. There are a few ways to select the desired seating area:
- Entering the quantity desired and hitting “Enter”. This will assign the seats for you, by scanning the floor first, and if full, the bowl. The seats are assigned by “Best Available” at the time of your order being placed.
- Entering the quantity and clicking on “Add To Cart”. Click either “Floor” or “Bowl” (other price levels may be listed, depending on the event). By clicking the desired price level/area, seats are assigned in that level by “Best Available”. If seating is full in the desired price area the system will search in area different area and recommend tickets there if there are any available.
- Entering the quantity and clicking on the desired section (If available). For certain shows you may be able to directly click and choose a specific section on the reference map. If a chosen section is full, you will be prompted to modify your search and/or choose another area.
NOTE: Depending on the anticipated rate of the on-sales, there may be different methods to choose your seating area.
STEP 3: CONFIRM SEATS
The seats that are assigned to you are the best available at the time of your order. If these seats are not to your satisfaction, please click “release these tickets“, and then click on “continue shopping” to search for new seats. DO NOT use the “back” button if you want different seats, as this will keep the seats you currently have on hold and may cause you to experience purchase delays, time outs, or the locking of your order.
Repeat steps a. and b. above. If these seats are satisfactory, please proceed to the next step.
IMPORTANT NOTE: For heavy traffice on-sales you may not be able to reserve another set of seats
STEP 4: DELIVERY METHOD
Before being able to proceed you will have to select a delivery method. Depending on the performance there may be numerous options: Will Call, Regular Mail, Print at Home, and Mobile Tickets.
- Will Call indicates you will pick up your tickets at the Box Office prior to the event (due to long lineups, we highly suggest that you pick up your tickets well in advance of the performance).
- Mail indicates that you desire to have the tickets mailed to you for a nominal fee. Currently we deliver only within Canada. The tickets will be mailed to the address that you will be providing in the next steps.
- Print at Home sends you an e-ticket in a PDF file format. This is an actual ticket. Due to some Internet Service Providers security settings, the print at home tickets can either be delayed or not delivered at all. Please make sure that your email is correct and current.
- Mobile Ticket sends you a mobile ticket in a PDF or Apple Passbook format that is optimized to display on your smart phone. This is an actual ticket. Due to some Internet Service Providers security settings, mobile tickets can either be delayed or not delivered at all. Please make sure that your email is correct and current.
STEP 5: CONFIRM
Click “Check Out” if the information and desired seats are both correct.
STEP 6: NEW CUSTOMER
If you are new customer click on “Register Now” and proceed to the next step. If you are an existing customer with an online account, or if you have created an account prior to the on-sale, please enter your email address or account number along with your password and skip to STEP 8.
STEP 7: ACCOUNT CREATION
Enter all of the required information (the fields marked with *). Please ensure that if you selected to have the tickets mailed to you, that the address you provide is the address you would like the tickets mailed to. Click on “Next Step” if all of your information is accurate and complete.
NOTE: There is a time frame of 6 minutes for you to complete the shopping process. If you take longer than the allotted time, your tickets will be released and you must start over from Step 1
TIP: You can create an account at any time prior to an on-sale.
STEP 8: PAYMENT
Verify your account information. If it is all accurate, enter your credit card number (Visa or MasterCard), expiration date, and the card verification number. This will be the credit card that will be charged for the purchase of these tickets. Click “Submit Payment” to complete your sale.
STEP 9: ORDER CONFIRMATION
Your order confirmation will appear. If you wish to print this page for your records, please click on “Print” on the right hand side of the page, under General Information.
top
Creating an Online Account
STEP 1: NEW CUSTOMER
There are two different times at which you may create an account for online purchases: when you are purchasing tickets and prompted to create an account; or at any time without being in the purchase process, by clicking the “Login /New Account” button.
If you wish to create an account, click “Register Now” to proceed.
STEP 2: ACCOUNT CREATION
Enter all of the required information (the fields marked with *). Please ensure that the address you provide is correct. Click on “Next Step” if all of your information is accurate and complete. NOTE: When purchasing tickets, there is a time frame of 6 minutes for you to complete your entire order.
Tip: Remembering the email address and password used will make future online purchases quick and seamless.
top
How to Become an Insider with Select Your Tickets
STEP 1: CLICK ON “SIGN UP” TO JOIN OUR MAILING LIST
Please click the “Sign Up” button on the home page under JOIN OUR MAILING LIST, or click here (opens in a new window) to begin.
STEP 2: ENTER INFORMATION
Fill out the Email Sign Up Form with your email address and name. Select which types of emails you would like to receive notifications for. Click “Submit”.
STEP 3: EMAIL CONFIRMATIONS
Shortly after you’ve entered all of your information and submitted it, you will receive a confirmation email with a link to update and modify your subscription settings.
top
How to Renew Your Season Tickets/Select a Payment Schedule for your Ticket Package Online
Step 1 – Sign in to your Select Your Tickets online account
If you already have an email and password then sign in as normal and skip to Step 4.
If you have never used the website before but are an existing Rockets Season Ticket Holder, click “Activate Account”
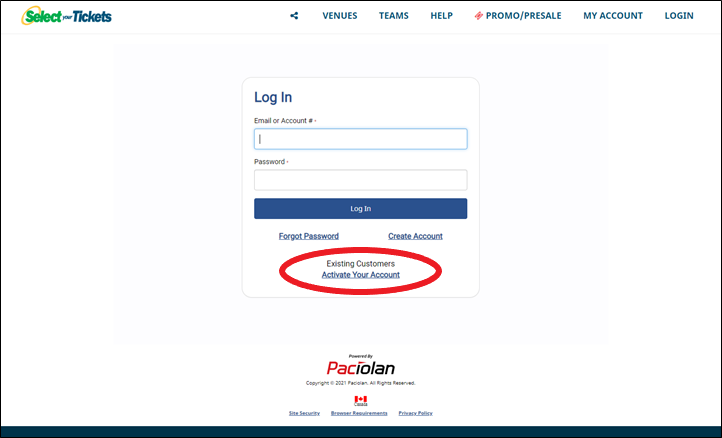
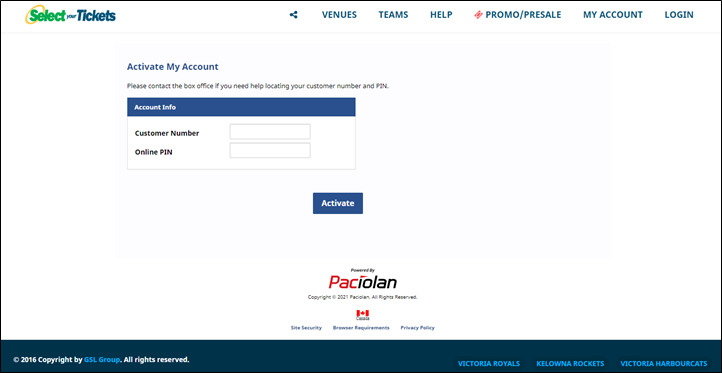
Step 2 – Activate Your Account
In order to Activate Your Account, you will need your Customer number (account number) and your unique PIN number. The Online Renewal email you received will have your Customer number in it. For your PIN number, please contact us at 250-762-5050 and we will provide it for you.
Step 3 – Fill in Account Information
Make sure the address, phone number, and email are correct. Keep your password written in a safe place. Once you are happy with the information, click next.
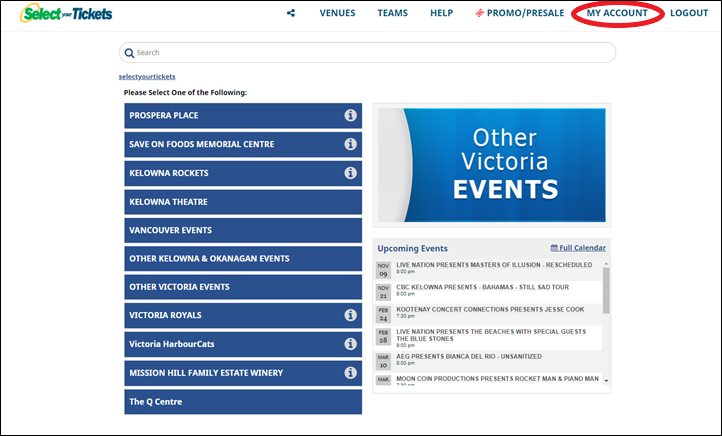
Step 4 – Sign In and Click “MY ACCOUNT” in the top right
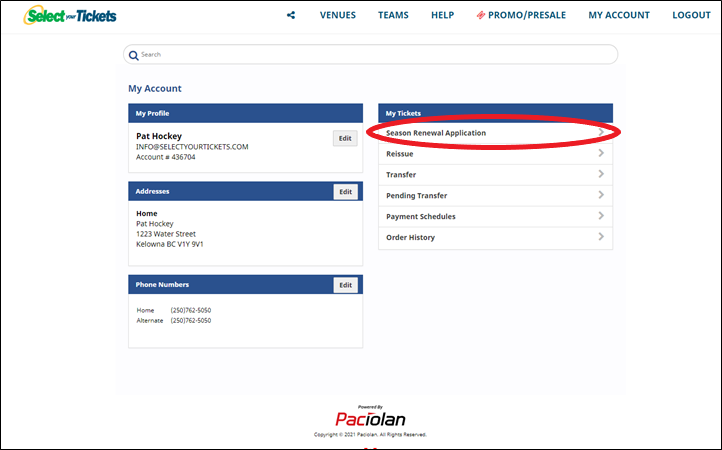
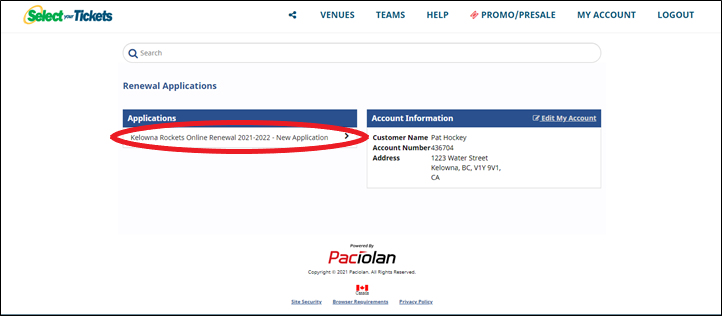
Step 5 – Select “Season Renewal Application”
Step 6 – Select “Kelowna Rockets Online Renewal – New Application”
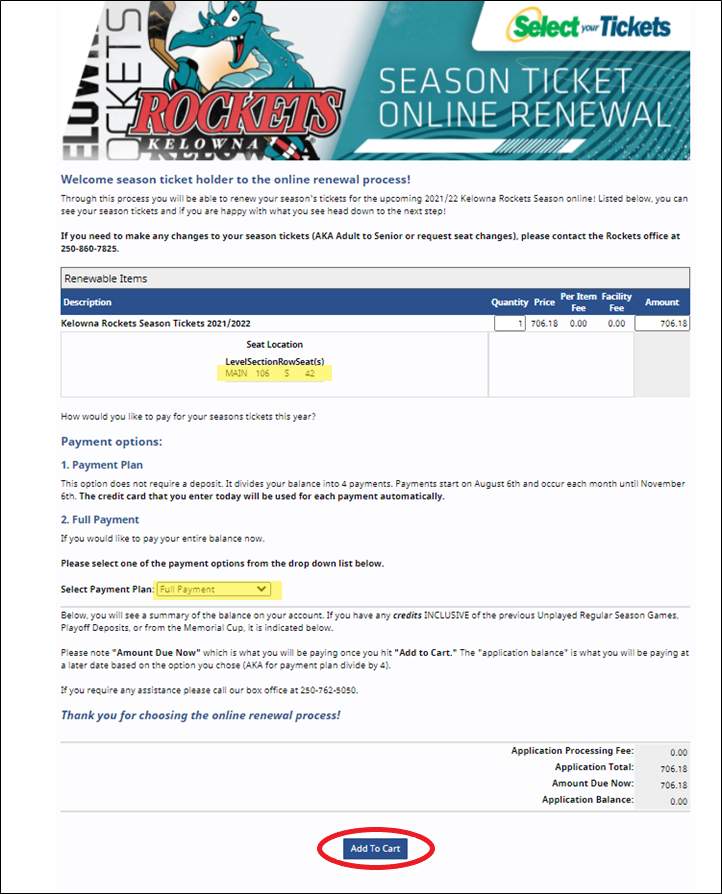
Step 7 – Review Your Information and Payment Options
Review your seat information then a payment plan from the drop down menu.
If you have any playoff credits you will see them applied to the total at the bottom.
Click “Add to Cart” after you have selected the payment option.
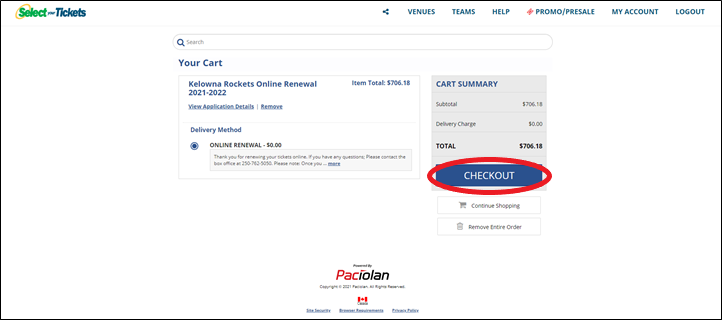
Step 8 – Review Information
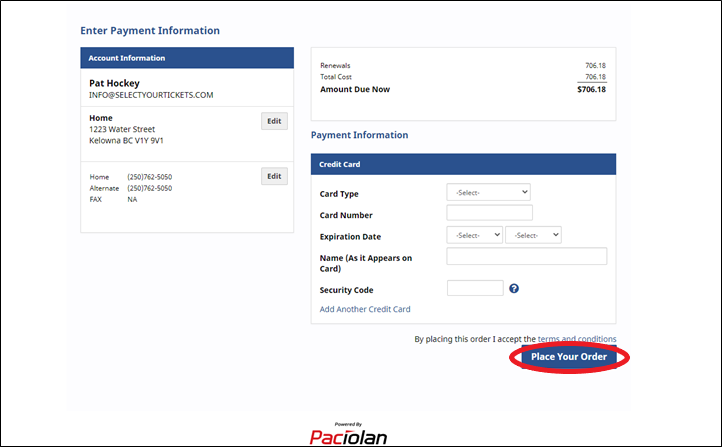
Step 9 – Place Order
Confirm you information and put in your credit card information. You will have to enter your credit card information no matter what payment option you choose, as this will be the credit card used on all future payments for the season. At this point you CANNOT go back and change your season tickets online renewal. When done click on “Place Your Order”.
Step 10: Order Confirmation
You will be taken to the Order Confirmation page, this will confirm that your season tickets are ordered! From here you can print off and review all your season ticket information. You will also receive an e-mail confirming your order.
Print-at-Home Ticket Download Tutorial
Ticket Exchange Tutorial
ALL-IN-1 Pass
Introducing ALL-IN-1, a new smart mobile ticket. The ALL-IN-1 pass is here to help reduce the hassle of a cluttered wallet or locating your tickets. Rather than having to keep track of 36 separate tickets, simply download one mobile pass to your digital wallet once per seat. Once a game has been concluded your ALL-IN-1 mobile pass will simply rotate to the next game in your season ticket booklet.
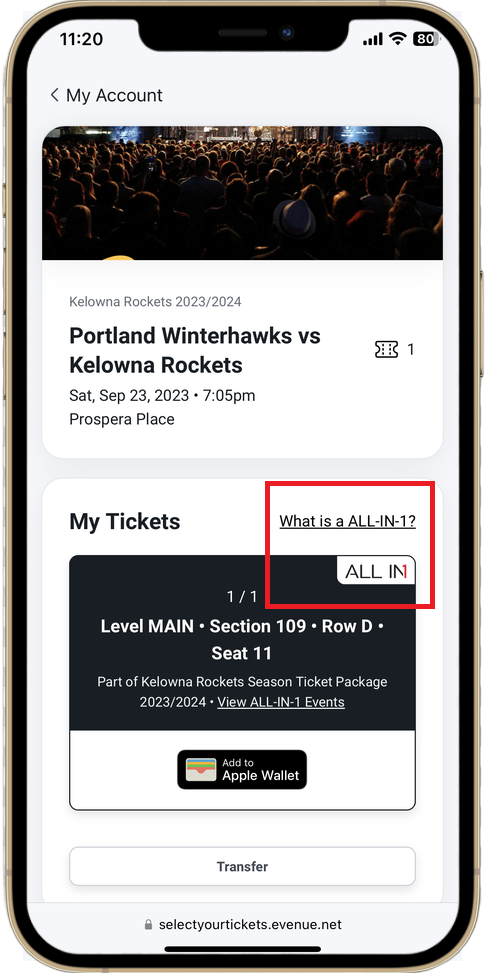
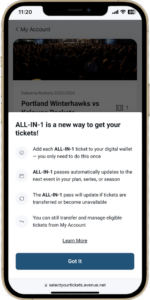
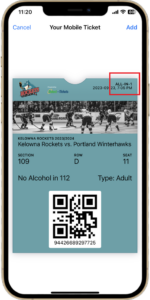
ALL-IN-1 Pass FAQ: https://app.paciolan.com/ALL-IN-1